How to Set Up Canon PIXMA TR7120 for Wireless Printing Easily
Printing wirelessly from your Canon PIXMA TR7120 is extremely convenient—no need for cables, and you can print from multiple devices over your home or office WiFi. This guide walks you through every step, from preparing your network to installing drivers and testing the connection. By the end, your TR7120 should be fully set up for wireless printing—reliably, securely, and seamlessly.
Table of Contents
- What You’ll Need
- Why Wireless Printing Is Useful
- network & router setup
- Preparations before installing
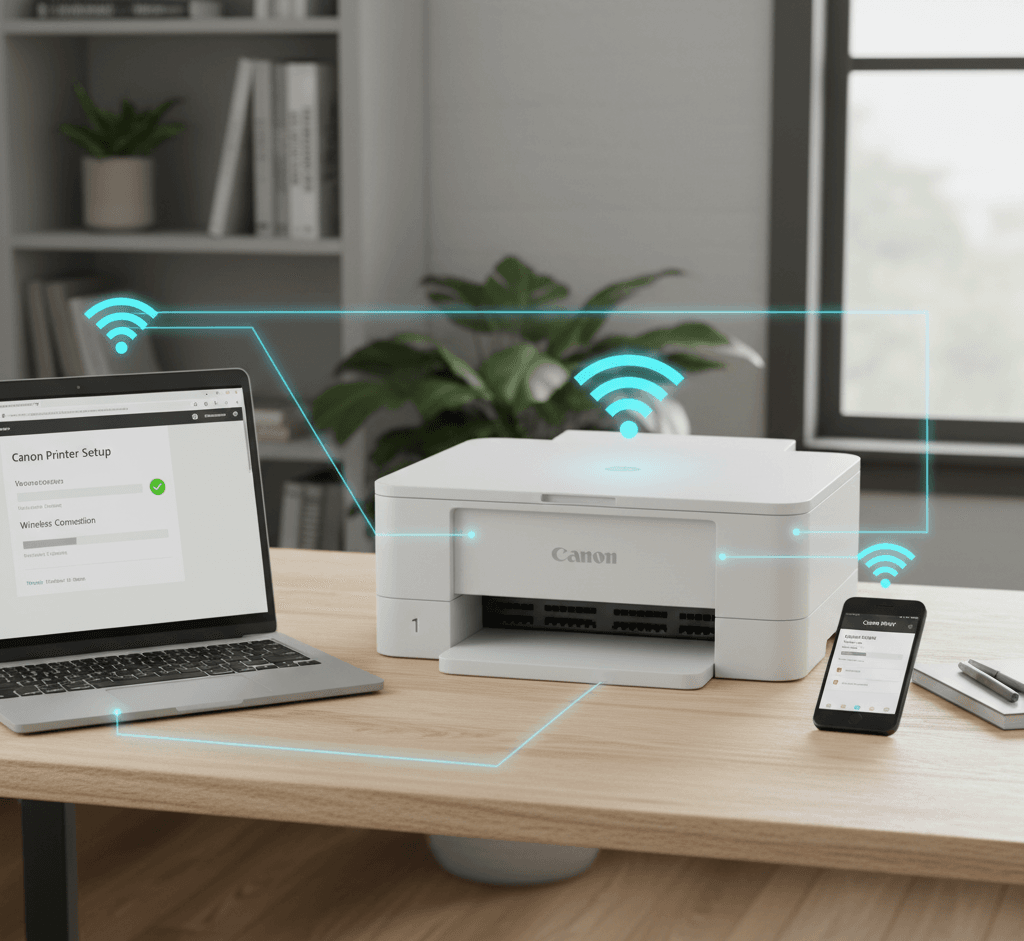
- Methods to set up wireless on PIXMA TR7120
- Easy Wireless Connect
- Manual (Wi-Fi setup via control panel)
- WPS (if router supports)
- Installing the printer driver & software on PC/Mac
- Adding the printer to your system (Windows, macOS)
- Mobile / smartphone printing setup
- Troubleshooting common issues
- Tips for reliability, security & maintenance
- Summary & concluding thoughts
1. What You’ll Need
Before you start, ensure you have:
- A working WiFi router with SSID (network name) and password
- A computer (Windows or macOS) connected to that WiFi network
- The Canon PIXMA TR7120 printer, powered on
- USB cable (optional, for initial setup)
- The correct drivers / Canon software for TR7120 (downloadable from Canon support site) Canon USA
- Optionally, smartphone (iOS/Android) for mobile printing
2. Why Wireless Printing Is Useful
Wireless printing allows multiple devices (laptops, phones, and tablets) to print without needing physical USB connections. Benefits include:
- Flexibility—place the printer anywhere within WiFi range
- Convenience—no cable clutter
- Multi-user setup—everyone on the same network can print
- Remote / mobile printing—print from your phone or tablet
Once it’s properly set up, you’ll hardly notice the difference from a wired printer—except for the convenience.
3. Network & Router Setup
Before connecting the printer:
- Make sure your WiFi router is on and working.
- Ensure your computer is connected to the same WiFi router.
- Make sure your WiFi SSID and password are known.
- If your router has separate 2.4 GHz and 5 GHz bands, taking note of both helps. The TR7120 supports dual-band WiFi (2.4 GHz / 5 GHz) per its specs. Canon USA
- It’s best to place the printer within decent range of the router so that signal is strong.
- If there’s a firewall or advanced router security settings (MAC filtering, AP isolation), you may need to adjust them so the printer can communicate.
4. Preparations Before Installing
- Remove any old printer drivers or conflicting software to reduce interference.
- Download the latest driver and software package for TR7120 from Canon’s support page. Canon USA
- Ensure your computer’s operating system is up to date.
- Temporarily disable the firewall or antivirus during installation if you run into connection issues—you can re-enable them afterwards.
- Keep your WiFi credentials (SSID + password) handy.
5. Methods to Set Up Wireless on PIXMA TR7120
Canon offers multiple ways to connect to WiFi. Choose based on your situation.
A. Easy Wireless Connect (Recommended for most users)
This method lets the software help you connect the printer to the WiFi network.
- On your computer, run the Canon setup software or driver installation package.
- When prompted for connection method, choose “Wireless connection (recommended)” or “Easy Wireless Connect.”
- The software will guide you and temporarily send settings to the printer, which then connects to your network.
- Enter your WiFi SSID and password when prompted.
- Once connected, the blue WiFi light on the printer should stay solid.
(This method is common in Canon’s PIXMA wireless setup guides.) Canon Central and North Africa +2Canon Australia +2
B. Manual Wi-Fi Setup via Printer’s Control Panel
Use this when the software method fails or if you prefer doing it manually:
- On the printer’s LCD screen, go to Menu / Settings → LAN settings → Wireless LAN setup (or WiFi setup) Canon Support +1
- The printer will search for available WiFi networks.
- Select your network’s name (SSID).
- Enter the network password (case-sensitive).
- Confirm and wait until the connection is established—the wireless light will become stable.
- If there’s an option like “Manual connect” or “Specify SSID/Password manually,” choose that if your network doesn’t appear automatically. Canon Support +1
C. WPS (Wi-Fi Protected Setup)—If Your Router Supports It
Use this shortcut if your router and printer both support WPS (push-button connection):
- On the router, press the WPS button.
- Within a short timeframe (usually 2 minutes), press the WPS or WiFi button on the printer.
- The printer and router will negotiate the connection automatically, without entering a password.
- Wait for indication of success (WiFi light solid).
(Note: Not all routers or printers support WPS, and for security reasons, it may be disabled on some routers.)
6. Installing the Printer Driver & Software on PC/Mac
Once your printer is connected to WiFi, the next step is to install the driver and software.
Windows
- Download the driver package from Canon’s support site by specifying TR7120 and your Windows version. Canon USA
- Run the installer (often named something like Setup.exe).
- When the installer asks for the connection method, pick Wireless/Network.
- The installer should search for printers on your network; when it finds TR7120, select it.
- Complete the installation steps (accept license agreement, choose options).
- After installation, you may be prompted to print a test page—do that to verify.
macOS
- Download the macOS driver/software for the TR7120 from Canon’s support.
- Open the .dmg or package installer and run the installation.
- During setup, choose Add Printer and select the TR7120 listed under Network / Wireless.
- If macOS promptsto add via “Bonjour” or “AirPrint,” confirm those options.
- Complete the installation and print a test page.
7. Adding the Printer to Your System (Windows, macOS)
If after installation your system doesn’t automatically detect it, you may need to manually add the printer.
Windows
- Go to Settings → Bluetooth & devices → Printers & scanners.
- Click Add device or Add a printer or scanner.
- Windows should scan your network; select “Canon TR7120 Network” (or a similar name).
- If it doesn’t appear, click The printer that I want isn’t listed → Add a printer using a TCP/IP address or hostname → enter the IP address of your printer.
- Follow the wizard to complete.
To know the printer’s IP: check the printer’s Network Settings menu, or print out a network status sheet from the printer.
macOS
- Go to System Settings → Printers & Scanners.
- Click Add Printer (“+” button).
- In the list, under Default, you should see TR7120 (via Bonjour / network).
- Select it and click Add.
- If needed, select the correct driver or “AirPrint / Canon TR series” as the driver.
8. Mobile/Smartphone Printing Setup
To print from your iOS or Android phone:
iOS (iPhone / iPad)
- Use AirPrint (if supported)—the printer should appear automatically in the Print dialog.
- Or install the Canon PRINT Inkjet / SELPHY app from the App Store, then let the app detect the TR7120 and print.
Android
- Use the Canon PRINT Inkjet / SELPHY app from Google Play—it will detect the printer over WiFi and let you print from the gallery, docs, etc.
- Alternatively, use Mopria Print Service or the native print service in Android to detect network printers.
9. Troubleshooting Common Issues
If things don’t go smoothly, here are common problems and fixes:
Problem Possible Cause Solution Printer not found during setup Network mismatch, firewall, or wrong SSIDE Ensure the PC and printer are on the same WiFi; disable the firewall temporarily.Wireless light blinking instead of solid Connection in progress or failedRetry setup, reduce distance to router Printer goes offline.IP address changed Make the printer use a static IP or reserve it via the router. DHCP Driver installation fails.Wrong driver version or OS mismatch Download the correct driver for your OS.Cannot enter WiFi password Wrong keyboard layout or input Make sure characters are correct (case sensitive).The mobile phone cannot see the printer.Different network or isolation Ensure the mobile is on the same WiFi and disable AP isolation.
Always check the Canon support site or manual if specific error codes show up.
10. Tips for Reliability, Security & Maintenance
- Reserve a static IP (or DHCP reservation) for your printer in router settings. Prevents IP changes from breaking the connection.
- Regular firmware updates: check Canon’s website for updates to fix bugs and improve compatibility.
- Use WPA2 or WPA3 encryption on your WiFi—avoid open or WEP networks.
- Avoid placing the printer behind too many walls or far from the router to maintain signal strength.
- Restart router/printer if connection drops.
- Clean print heads / perform nozzle checks periodically to keep print quality sharp.
- Monitor ink levels to avoid running dry mid-print.
- If using printing via phone, avoid public WiFi unless the printer is protected or via a secure VPN.
11. Summary & Concluding Thoughts
Setting up Canon PIXMA TR7120 for wireless printing doesn’t have to be complicated. The key steps are
- Make sure your network and devices are prepared.
- Use Easy Wireless Connect or manually via the printer’s panel to join WiFi.
- Install the correct drivers/software and add the printer to your operating system.
- Configure mobile printing if desired.
- Troubleshoot issues using the steps listed above.
- Use best practices (static IP, firmware updates, security) to ensure stability.
Once done correctly, you’ll enjoy the convenience of printing from any device on your network—without cables. Agar chaho, main ab is article ko Urdu version ya step-by-step screenshot guide bhi banadoon jisse apke readers ko aur asaani ho?
References
- Canon Official Support – PIXMA TR7120 Drivers & Downloads
👉 https://www.usa.canon.com/support/p/pixma-tr7120 - Canon Knowledge Base – PIXMA TR7120 Wireless LAN Setup Guide
👉 https://support.usa.canon.com/kb/s/article/ART174794 - Canon Knowledge Base – Easy Wireless Connect Setup for PIXMA TR7120
👉 https://support.usa.canon.com/kb/s/article/ART179389 - Canon PRINT Inkjet/SELPHY App – Mobile Printing Setup
👉 https://en.canon-cna.com/support/consumer_products/pixma_printer_wireless_connection_setup

